Getting Started
Overview
This guide helps new players set up their accounts, navigate the interface, and begin their journey in Outlaw Troopers.
Step 1: Login & Account Setup
Access the game here: https://play.outlawtroopers.io/
- Email Login: Register with your email to save your progress.
- Guest Play: Start instantly without an account. (Note: Progress is temporary and saved only to your browser cache.)
- Link Wallet (Optional): Link your wallet to use your NFTs or access existing progress (Fragments, Vault Assets, and unclaimed Prizes).
⚠️ IMPORTANT: Wallet Linking Rules
- Permanent Link: Once a wallet is tied to your email, it cannot be removed or changed.
- 1 Email = 1 Wallet: Each email address can only be linked to one wallet address.
- Switching Wallets: If you want to use a different wallet or a different blockchain, you must register a new email.
Step 2: Select Your Regional Server
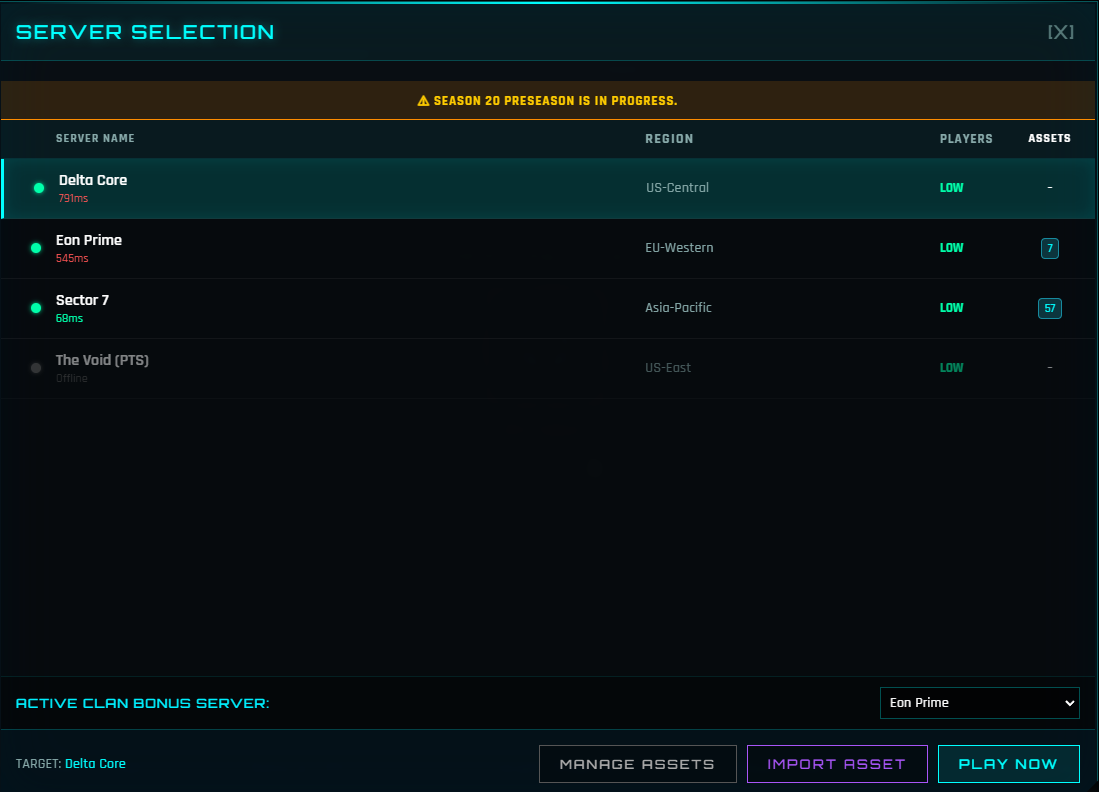
The game runs on Regional Servers to provide the best performance and speed.
- Regions: Choose between US, EU or Asia.
- Regional Progression: Your Empire level, Credits, and progress are unique to each Server. They do not transfer between regions.
- Multi-Play: You can build a different Empire on every Server using the same account (e.g., one on SG and one on EU).
Step 3: Import & Manage Your Assets (For Wallet Users)
You must manually choose which Assets to bring into which Server. You will find the Import Asset and Manage Assets buttons at the bottom of the Server selection screen.
- Import Asset: To use an Asset (e.g., Ship, Gear, etc.), you must import it to a specific Server. Once imported, they are available for use on that specific Server.
- Manage Assets: You can unimport an Asset from one Server and import it to another at any time. This allows you to move your Assets (e.g. Troopers and Gears) between your different Regional Empires.
- Active Binding: If you sell an Asset and the new owner imports it to their account, that item will be automatically removed from your account.
Step 4: Start Playing
Once you've selected your Server, you can dive into the game!
Tutorial & Unlocks
- Follow the tutorial to unlock features gradually.
- Not all tabs or features are available at the start; completing the tutorial will unlock them.
- You can choose to skip the tutorial via the Settings button, but it's highly recommended that you follow and complete the tutorial especially for new players.
Interactive Top Bar
The resource icons at the top of the Main Interface are more than just counters, they are also shortcuts. You can click these icons to jump directly to specific menus. For example:
- Credits: Opens the Black Market.
- Radioactive Shard: Opens the Purification UI.
- Artifacts: Opens The Abyss menu.
Explore the other icons to find more shortcuts!
⚠️ Note: These shortcuts only become active after you have progressed far enough in the tutorial to unlock the corresponding features. If clicking them does nothing, continue following the tutorial tasks!
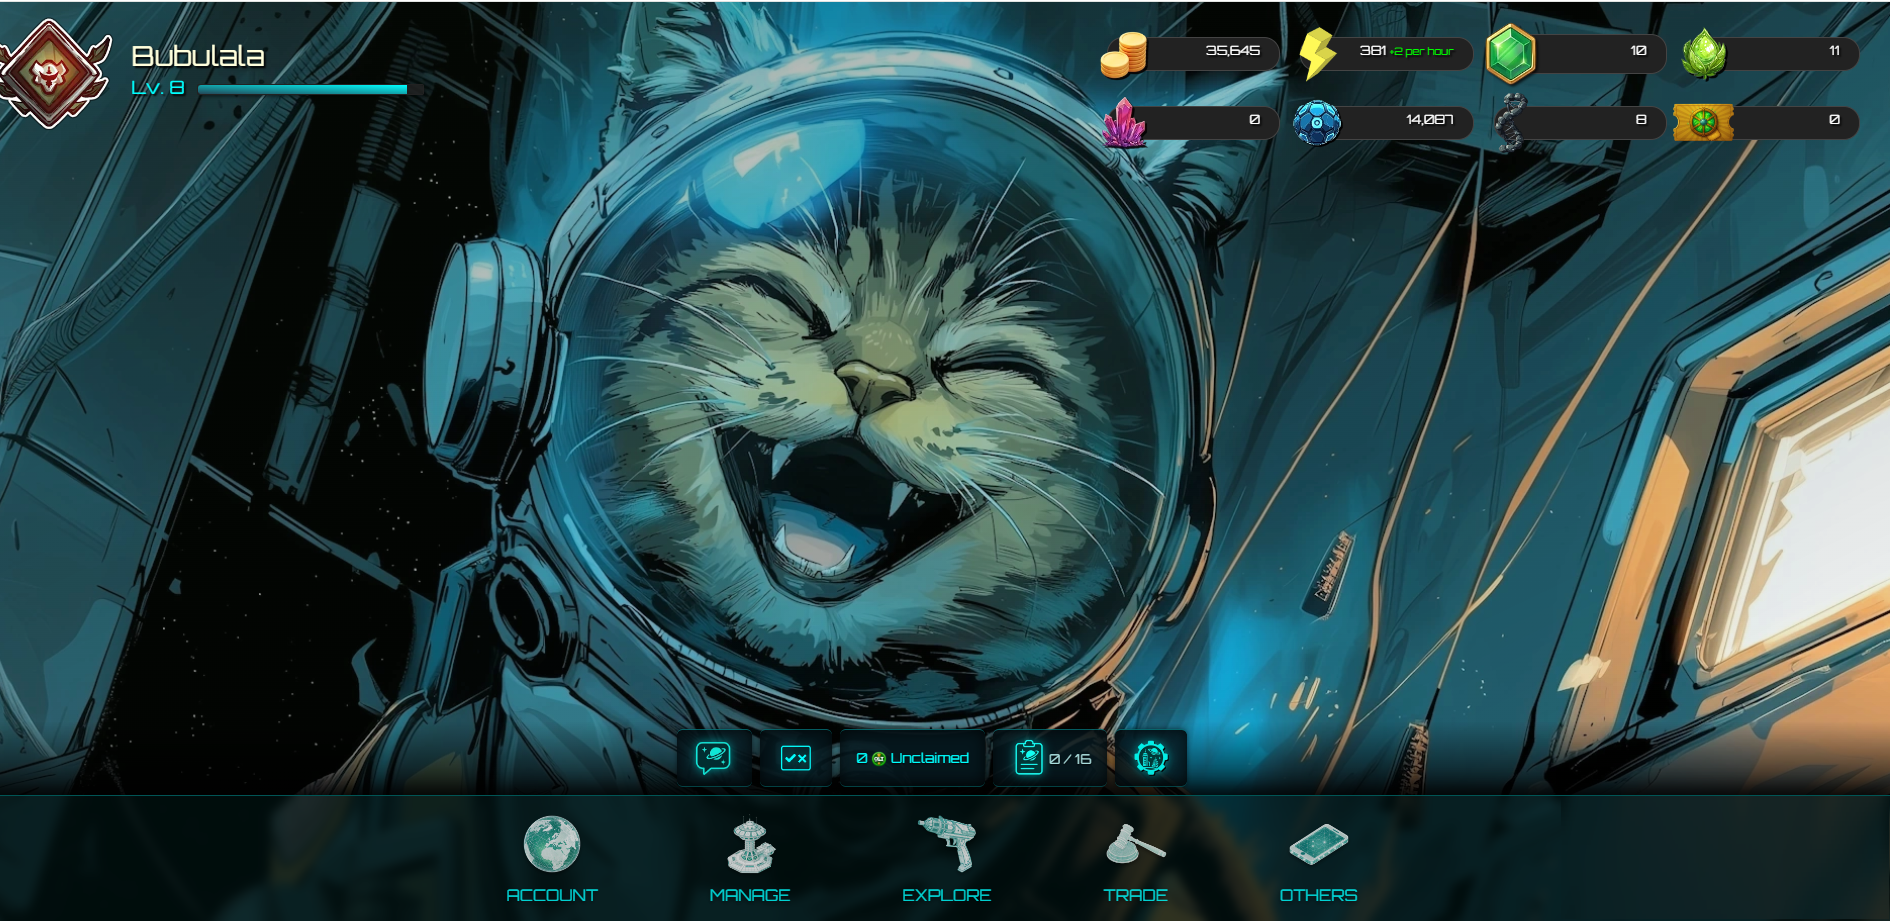
Some tabs remain locked until you progress through the tutorial.
- Account: Challenge, Faction Rank, Unclaimed OLT, Imported Assets, Vault
- Manage: Companion, Spacefarer, Tech Tree, Planet, Fragment, Clan, Resource Stats
- Explore: Encounters, The Abyss, A.R.C Quest, Ship Battle, Daily Bounty, AW Weekly
- Trade: Ship Forger, Inventory, Smuggling, FBX System, Purifying Shards, Joe's Shop
- Others: Leaderboard, What is OLT, What is Energy, Buy Me a Coffee, Wiki
Settings Button

- Settings
- Chat
- Patch Notes
- Skip Tutorial
Next Steps
Once familiar with the interface, explore the core game modes:
- Encounters: Start your battles and learn the basics in the Encounter Guide.
- The Abyss: Craft Biocrafts, explore through Delving, and fight in the Arena.
- Ship Battle: Build your fleet and compete in various Ship Battle modes.
- Spacefarer: Assign Companions and Troopers to passive missions for rewards.